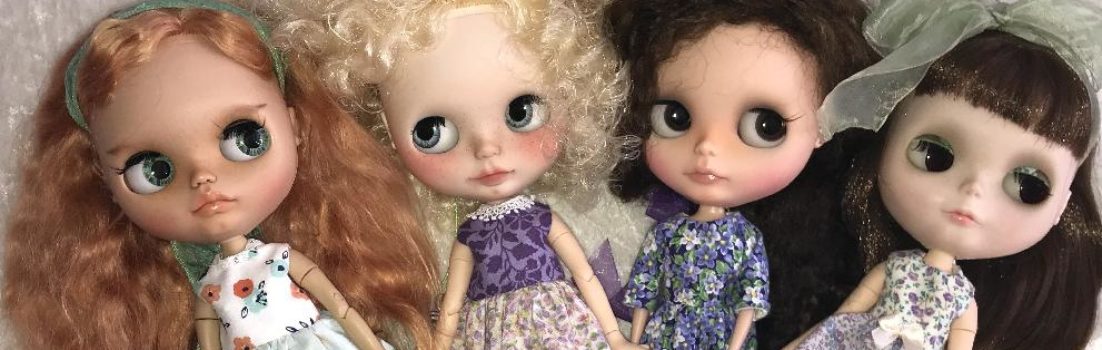
Wholesale Earring Kits Bundle

Blogged under Jewelry Designing, etsy by Tammy on Friday 3 May 2013 at 11:38 am

ONE!

TWO!


Sparkling Star Wire Earrings Jewelry Kit

THREE!

You can now purchase three of my Crafty Princess Earring kits at the wholesale price. I have bundled them together to create this wholesale earring kit package. The three kits include all the materials required to make three different pair of earrings, three full-color PDF file tutorials, and three gift boxes. All of this including shipping for only $30!

These same earring kits have sold retail at a major web-based jewelry supplier for $15 each, and that does not include shipping.

Head over to my Etsy shop now, and take advantage of this limited time wholesale earring kit collection offer!

Please Take My Jewelry Kit Survey

Blogged under Jewelry Designing by Tammy on Wednesday 17 April 2013 at 6:23 pm


Last year, I sold a few of my jewelry making kits both wholesale and through my Etsy shop. I didn’t make a ton of money, but I sold enough to the point I think I might be on to something. So I’m taking another look at my approach to jewelry kits. As a result, I realized I could use some consumer feedback, and I’d really appreciate it if my fellow crafters (whether you currently make jewelry now or not) would take just a few minutes to take this brief survey: http://www.surveymonkey.com/s/97KTDWN

Thank you!

Golden Crochet & Lampwork Necklace

Blogged under Jewelry Designing, crochet jewelry by Tammy on Saturday 11 August 2012 at 9:14 am

Here is another bead crochet experiment, and I think it turned out pretty well. I used size 10 gold-colored thread (which I think I got at Michael’s), a D crochet hook (3.25mm), and 17 - 10mm lampwork beads (these were made by DD Hess) in shades of purples and garnet. I formed the hook with some brass wire too. This was actually pretty easy to do, so here is a quickie tutorial for you.

Since the holes in these beads are fairly large, just thread the crochet thread through all 17 beads, and push them way down onto the spool of thread.

Row 1: Do the chain stitch until you have about 21 inches worth.

Row 2: Single crochet down the entire chain.

Row 3: Do 10 single crochets, then slide one bead down and up against the last stitch. *Do 5 single crochets, and moved a bead, and repeat from * until you’ve pushed all the beads down. Finish with about 10 (or so) single crochet stitches until you get to the end.

At this point, you should have a few inches on either end that has no beads on it. Fold these over, and  stitch the ends against the crocheted material you’ve just made by using a sewing needle threaded with more of the crochet thread.

You can either purchase a prefabricated hook or you can make your own using a little wire. I used 21-gauge brass dead-soft wire to make my hook.

Turquoise and Mother of Pearl Earrings

Blogged under Jewelry Designing by Tammy on Saturday 7 July 2012 at 9:48 am

Recently, I made a very cool necklace that includes a ceramic pendant with bunny rabbits on it. I posted the tutorial over at the About.com Jewelry Making site. For whatever reason, I did not make a matching pair of earrings at the time, and I have been wearing other earrings I already own with it. However, I felt this necklace really need a pair of earrings that more closely matched the beads I used in it.


To spread a little jewelry love, here is a tutorial here on these earrings I made to go with the necklace above.

For tools, you will need round-nosed pliers, chain-nose pliers, and wire cutters. The materials I used are as follows:

2 Turquoise nugget-style beads (about 12mm size)

2 8mm Faceted mother of pearl (natural colored) beads

8 Copper colored seed beads

2 Copper head pins

2 Copper ear hooks

About 8 inches of 21-gauge copper wire

1. First, put one copper colored seed bead, a mother of pearl bead, and another copper colored seed bead on a head pin.

2. Then use chain-nose pliers to bend the head pin into a 90 degree angle, just past the beads.

3. Holding this bend part of the head pin with round-nosed pliers, use your fingers to wrap the head pin around the pliers.


This will make a loop in your head pin that looks like this:

4. Use wire cutters to trim off the excess head pin.


5. Take a few inches of copper wire, use chain-nose pliers to bend the end into a 90 degree angle, and then use round-nose pliers to curl the bent wire into a loop.

6. Slip on one copper colored seed bead, a turquoise bead, and another seed bead, and make another wire loop at the top, cutting off excess wire.


7. Connect the turquoise component you just made with the mother of pearl section you made previously.


8. Attach one of the copper ear hooks to the top of the turquoise piece, and repeat all of the steps above to make a matching earring.

Now, be warned that it is really tough to find two turquoise nuggets that match perfectly. The two I found are pretty close, but one is a little thicker than the other. Still, they turned out alright and now I have a pair that better matches the necklace I made.

Some Jewelry in the Works

Blogged under Jewelry Designing by Tammy on Tuesday 19 June 2012 at 10:35 am

I have spending a lot of time stitching lately versus jewelry making. Admittedly, since jewelry making has turned into part of a crafting profession versus a hobby, it does not have the same appeal to me as crochet, knitting, cross stitch, or whatever because when I make jewelry, I always feel like I have to write up projects. I don’t make it just to “make it.” But I do have some jewelry pieces in the works that I am looking forward to making and wearing. These are kind of in the early design phase where I’m putting together components and thinking of construction ideas.


I purchased this adorable cat pendant from Earthenwood Studio. I plan to use glass purple pearl beads, tiny glass teardrop beads, and some flower lampwork beads for the necklace strap. I have not decided if these are all the beads I will use or not. I may want one more bead, maybe made of metal? I’m not sure. I’m also undecided at this point about the findings.

These lampwork glass beads are, I hope, going to transform into a pair of earrings and maybe a necklace or bracelet. I’m planning on using either white hemp or white waxed cord. I may include some crystals as well.

I’ve grouped these pin-wheel style beads together with the idea of maybe turning them into a bright summer style bracelet.

These red glass beads remind me of carnelian. I’m thinking of stringing them up on brown linen cord and knotting between the beads to make a long lariat style necklace that I could also wrap around my wrist a few times and wear as a bracelet.

Make the Connections Jewelry Components

Blogged under Jewelry Designing by Tammy on Thursday 24 May 2012 at 8:29 am

Pictured are some samples I received from Cousin.com, a company that manufacturers and distributes jewelry components through craft outlets such as Michael’s. They have two lines that are pretty cool, especially for anyone who would like to make jewelry but doesn’t have a lot of time. First (pictured at the top) is the Make the Connection line. It includes pendants and necklace and bracelet straps that you can connect to each other. You don’t need any tools because there are rings on the pendants that go around the connection pieces on the necklace straps.

For bracelets and rings, there is the Snap in Style line. The back of the ornamental components snap to the front of a ring base (see the second photo above) or a bracelet base (see the photo below).


Other than these allow you to design jewelry really fast and easy, you get the added advantage of being able to switch out and change the look of each jewelry piece as well.

Bag of Beads Haul

Blogged under Jewelry Designing, My College Craft Club by Tammy on Tuesday 1 May 2012 at 12:28 pm

Yesterday’s mail brought me a yummy load of lampwork beads from Dee Dee Hess of DeeDleBeads. She knows that the craft club I sponsor at school likes to make jewelry, and as it happens, we will definitely be making jewelry during the fall semester to sell at the DECA show we participated in last year. So she got a collection of beads for us, many of of them her test beads or seconds, but heck, they look pretty darn good to me. I can just picture these mixed with crystals to make some awesome memory wire bracelets. I know club members are going to love these!

More Jewelry Kits Out the Door

Blogged under Jewelry Designing by Tammy on Tuesday 14 February 2012 at 5:47 am

Part of my weekend was spent putting together jewelry kits for Annie’s Attic. This was reorder number 2, so I am keeping my fingers crossed that this will be a regular thing.

Now I have a good spot to sit and assemble the kits, and I am starting to get more of a pattern down when doing this so it doesn’t take me all day long to assemble a few dozen earring kits. I am also thinking of making more kits, especially now that I may have a good market for them. I have to say, however, that these first two kits have really taught me a lot about kit making, designing, and selling.

When you design a kit, you have two issues to deal with first: you want to create a pleasing design that has unusual materials in it, but you can’t really have materials that are too unusual because you have to be able to buy them repeatedly as you sell more kits. It is one of the catch-22 things: unique but not too unique. The other issue that relates to this one is cost. You want unique, easy to buy, and not too expensive; otherwise, you can price the kit too high for anyone to buy.

Another issue is color. You need to pick colors that obviously look good together, but you also have to consider how they will look when photographed and then the photos are added to a web site or catalog. As an example of a kit that does not do well as far as color is my Briolette Earring kit and tutorial that I sell on Etsy. When you see these in person, they have lots of sparkle, and I get compliments whenever I wear them. But, photographs just do not do justice to them because rose quartz, silver, and clear crystal do not show up well in photographs. No matter how much my husband and I played with the lighting and even tried enhancing the photos, they just don’t look the same as they do in real life.

These are just a few of the elements I have to think about as I work on future jewelry kits. It definitely makes my exercise my jewelry design muscles!

Create Your Style with Margot Potter In Tucson 2012

Blogged under Jewelry Designing, Shows by Tammy on Wednesday 11 January 2012 at 4:33 pm

Swarovski lovers are heading to Tuscon soon for the “Create Your Style” event hosted by Margot Potter:

Join Swarovski Ambassador and Designing Diva Margot Potter on January 31st at the Create Your Style Design Challenge and Event. It’s an 8 hour intensive design challenge, class and contest with fabulous prizes, sensational swag, sparkling inspiration all leading to a champagne reception and award ceremony! Are you ready to roll up your sleeves and show us what you’ve got? Visit http://www.create-your-style.com/Content.Node/additional/Tucson-Show-Guide-20… to find out more about the show and the event!

5th Bead Soup Blog Party Starting Soon!

Blogged under Around the Web, Jewelry Designing by Tammy on Saturday 24 December 2011 at 5:43 pm

Bead Soup Blog Party

Lori Anderson is about to start the fifth Bead Soup Blog Party. Registration runs January 7th through the 9th. Because these are so popular, she is going to set up participation via a lottery, with a cut off of 200 participants. For all the details about registration, participation, and the party rules, click on the image above, and you will be transported to her weblog that has all the 411 on how you can possibly be part of the next round of bead soup partying.

Next Page »